


This article was written and reviewed by Serge, MSc. I hold degrees in Plant Biology, Environmental Biology and Biogeochemistry, with research experience in plant physiology, ecosystem science, and field-based environmental studies. Every article on this site is grounded in real academic training and genuine scientific research.
Most people think plants are fragile organisms that are difficult to grow. That’s not true. Plants are highly efficient biological systems. If they receive the right resources, light, water, air, and nutrients, they will grow reliably. Hydroponics demonstrates this principle clearly.
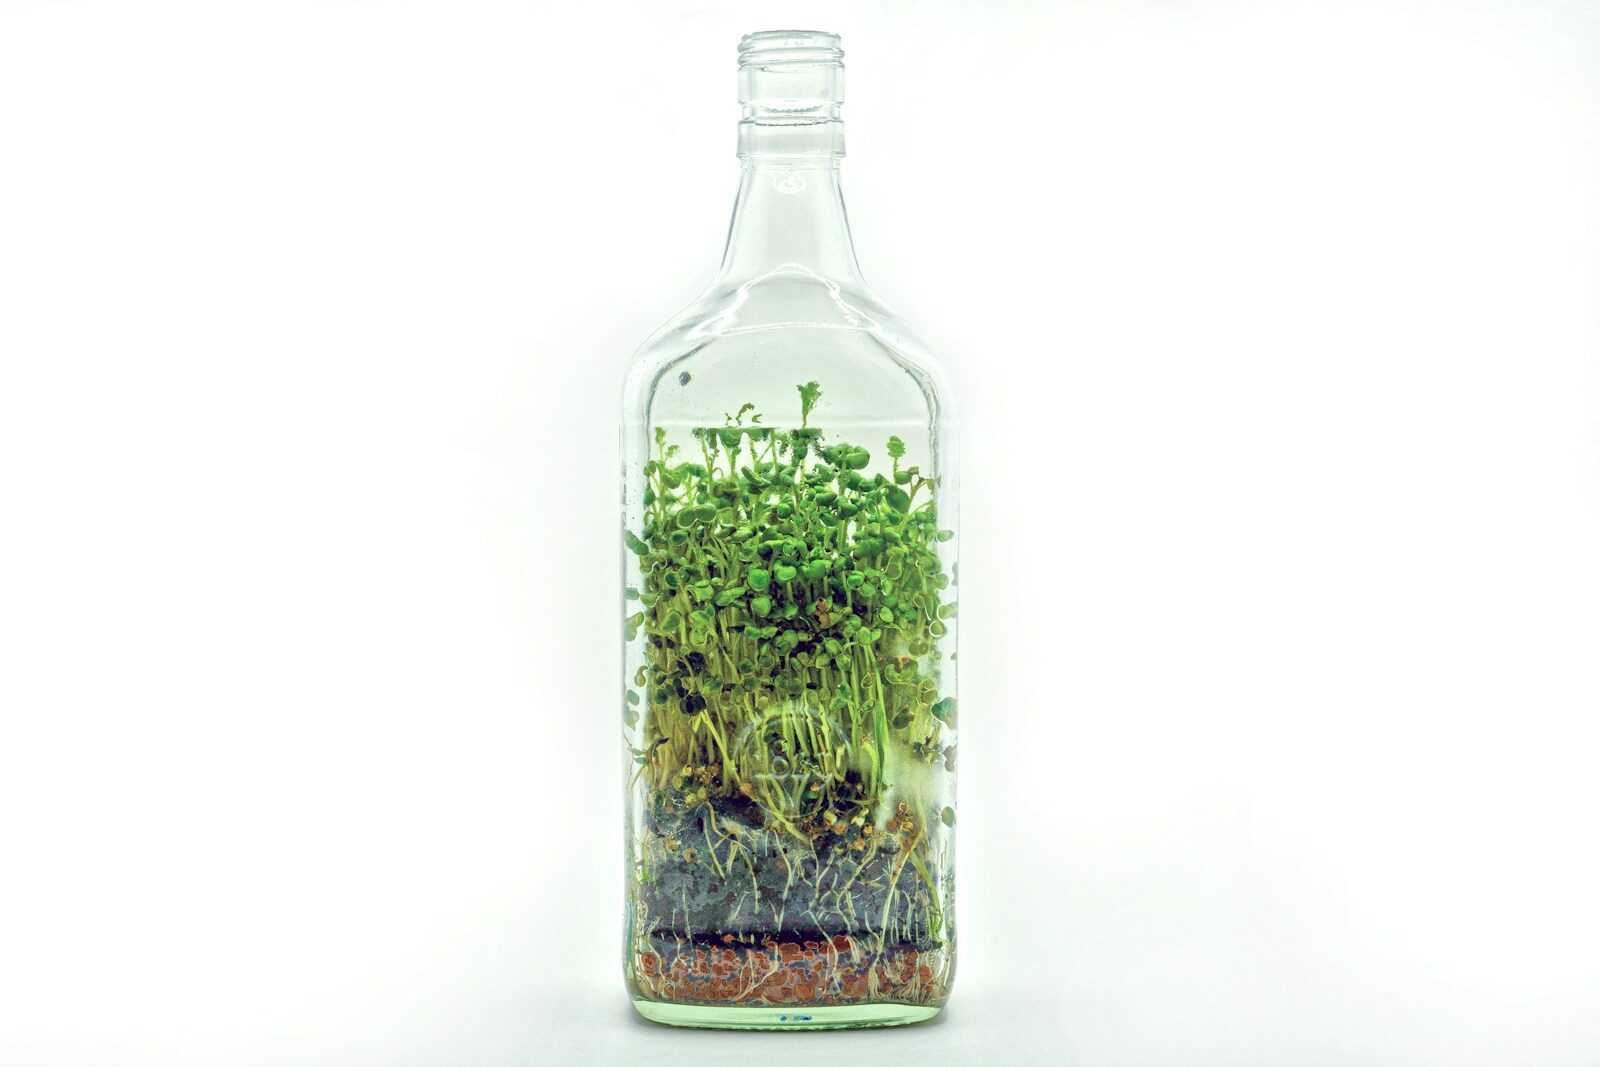
The first time I experimented with this, I didn’t use any specialized equipment. I started with an old pickle jar to test whether soil was truly necessary. It isn’t. Soil primarily serves as support and a nutrient reservoir. When you supply water and nutrients directly, plants grow faster because they don’t need to expend energy developing extensive root systems to acquire resources.
Why the Kratky Method Works.
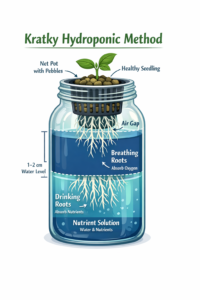
The Kratky Method, developed by Bernard Kratky, is a passive hydroponic system that allows plants to grow without pumps, electricity, or constant monitoring. In this method, plants are placed in net cups filled with an inert medium such as rock wool, clay pebbles, or coconut coir, suspended above a nutrient-rich water reservoir.
Only the root tips initially touch the water. As the plant consumes water, a gap of moist air forms between the water and the plant base, allowing roots to access oxygen naturally. These “oxygen roots” branch laterally, supplying the plant with the oxygen it needs for healthy growth.
Because the system is non-circulating, no additional water or nutrients are needed after the initial setup, making it low-maintenance and ideal for home growers or small-scale urban agriculture. The Kratky Method works best with leafy vegetables that don’t require large amounts of water.
By mimicking natural root aeration without mechanical systems, it provides a simple, cost-effective, and reliable way to grow food sustainably (Gumisiriza, Ndakidemi & Mbega, 2022).
What You Actually Need for a DIY Kratky Hydroponic System
You don’t need a commercial hydroponic kit. Most items can be sourced from home or inexpensive local stores.
1. The Container:
A 1-liter glass jar or similar container works well. It should be stable enough to support a growing plant without tipping.
2. The Plant Holder:
Use a small cup or net pot with multiple 1 cm holes in the bottom and sides. This will hold the plant and allow roots to extend into the water. You can use a yogurt cup or disposable coffee cup, carefully perforated with a heated nail or soldering iron.
3. Support Material:
Place clean pebbles, marbles, or aquarium gravel in the cup to stabilize the plant. This prevents tipping as the plant grows.
4. Nutrients:
Hydroponic nutrient solutions are essential, as standard soil fertilizers lack some micronutrients. Mix according to instructions, but start with slightly lower concentrations to avoid root burn.
5. Seedlings:
Leafy herbs like basil or lettuce are ideal. They respond visibly to conditions, making it easy to monitor plant health.
Step 1: Preparing the Nutrient Solution
Tap water often contains chlorine, which can damage delicate roots. Fill your container with water and let it sit for 24 hours to allow chlorine to dissipate. Add the hydroponic nutrients after this period, following the instructions but slightly underdosing at first.
Step 2: Positioning the Plant and Creating the Air Gap
Place the seedling in the perforated cup and set it on the jar. Only the bottom 1–2 cm of the roots should contact the nutrient solution.
Roots in water are the drinking roots.
Roots in the air gap are the breathing roots, absorbing oxygen.
As the plant grows and water level drops, the air gap increases, and the plant naturally forms more breathing roots. Never refill the jar beyond halfway, as submerging the breathing roots can lead to root rot.
Step 3: Preventing Algae
Roots and nutrient water should be kept in darkness to prevent algae growth. Wrap the jar completely in foil or other opaque material. Even small amounts of light exposure can trigger rapid algae growth, which competes for nutrients and oxygen.
Step 4: Monitoring and Troubleshooting
White fuzz on roots: Normal root hairs, indicates healthy oxygen absorption.
Grey or slimy fuzz: Mold, often due to stagnant air. Improve ventilation.
Yellow leaves: Nutrient imbalance, often iron deficiency. Adjust pH or add a small acid like lemon juice.
Wilting with water present: Roots may be rotting or the air gap may be insufficient. Check water level and root health.
Why This DIY Setup Works
This simple Kratky hydroponic system removes unnecessary complexity. By providing an optimal environment for roots, water, nutrients, and oxygen, you create a passive, self-regulating growth system. Observing the plant gives immediate feedback on conditions, allowing for precise adjustments.
This method demonstrates that hydroponics is not about “green thumbs,” but about chemistry, biology, and system design. With proper setup, a small jar becomes a mini-lab, offering a reliable way to grow healthy herbs and leafy greens at home.